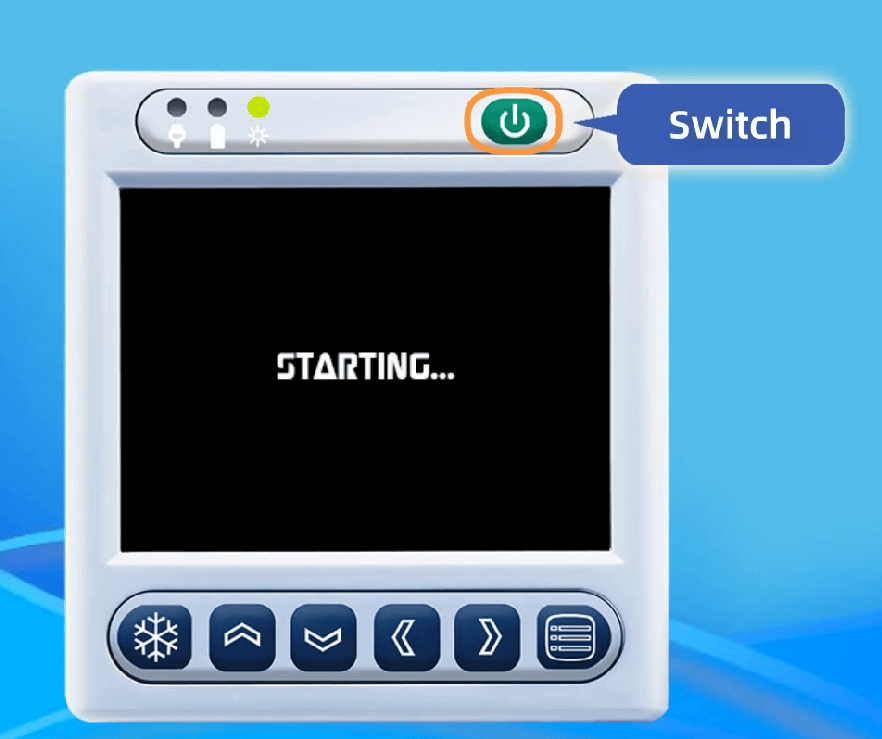
Step 1: Press The Power Button To Switch On The System.
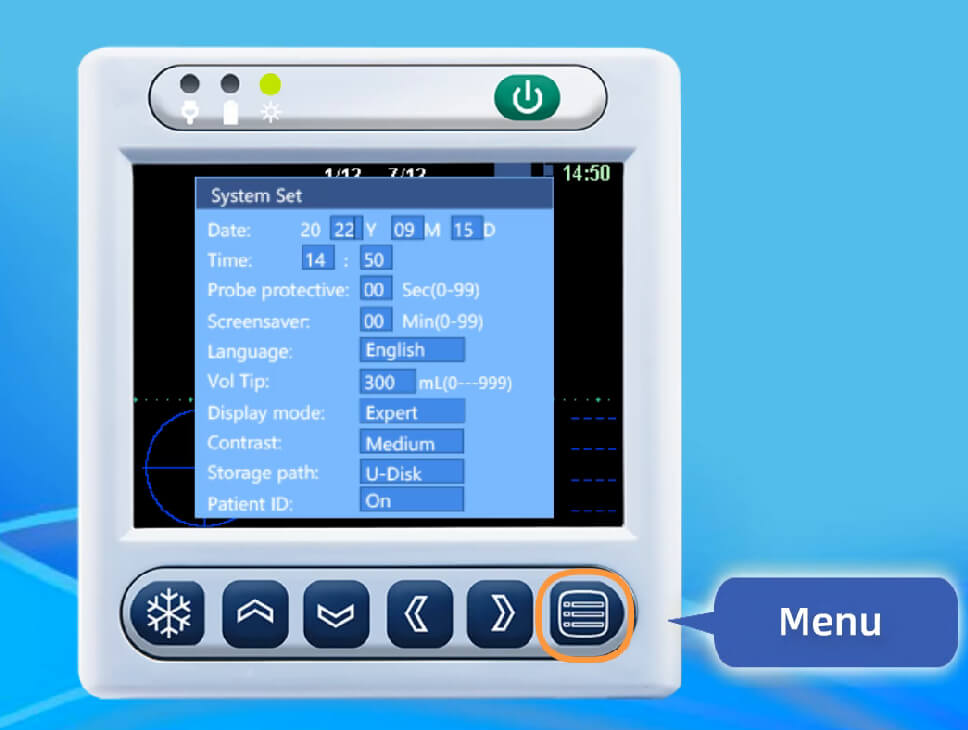
Step 2: Each Item Setting
Date, time, language, mode, contrast and patient ID settings are made here.
Step 3: Select Patient Type
There are five patient types to choose from:
Male,Female,Female With Hysterectomy,Child,Obesity.
Please select the corresponding patient type according to the button instructions shown below.
Step 4: Prepare The Patient
The patient should be in a supine position so that the abdominal muscles relax. First find the pubis, and then apply an amount of ultrasound coupling gel on the pubic above 3cm from the center of the abdomen (Keep air bubbles as few as possible);
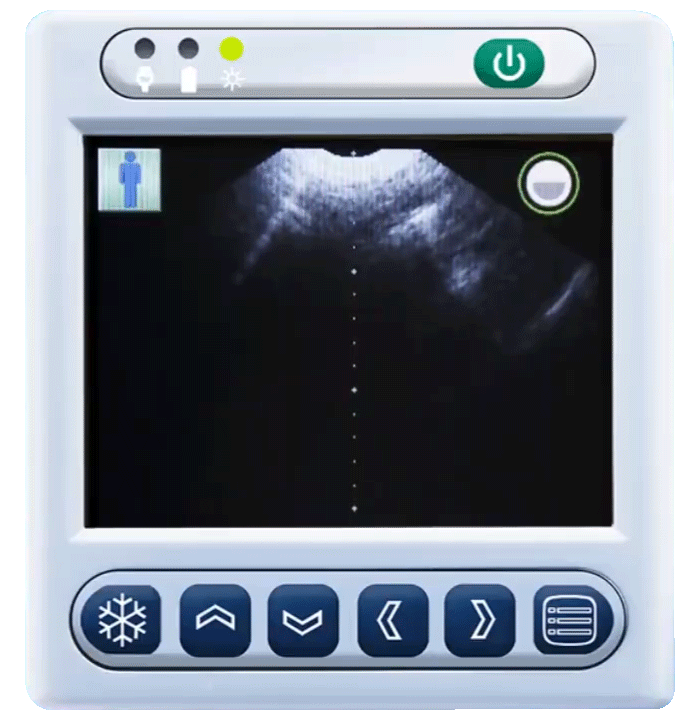
Click one of the following two buttons to start the scan.
Just wait less than 4 seconds for scanning results.
And the system issues a "tick" tone, the scan is completed.
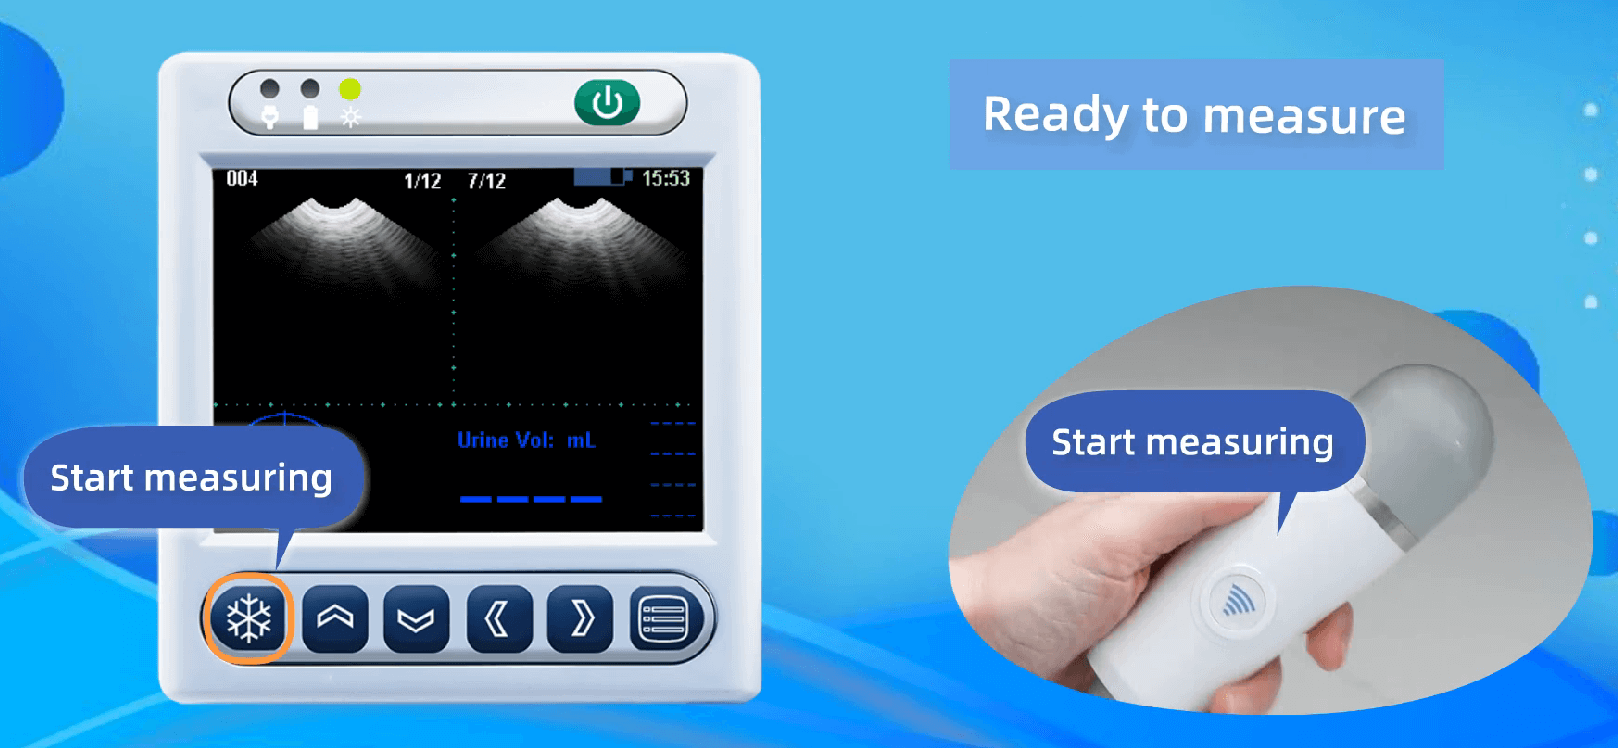
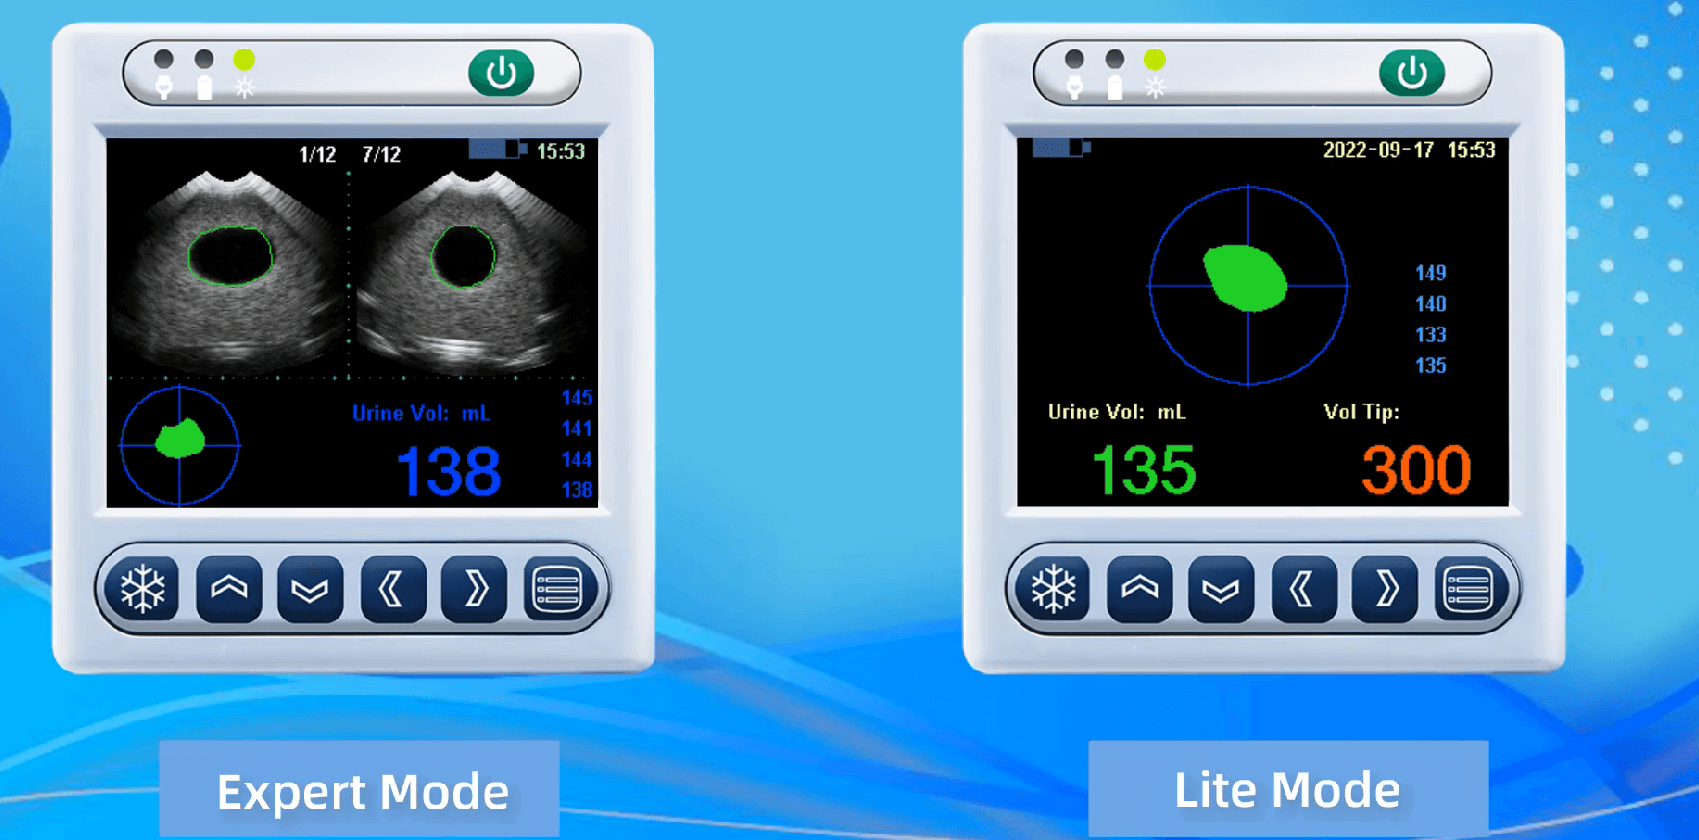
Step 5: View Measurement Results
The BladGo portable bladder scanner is available in Expert Mode and Lite Mode.
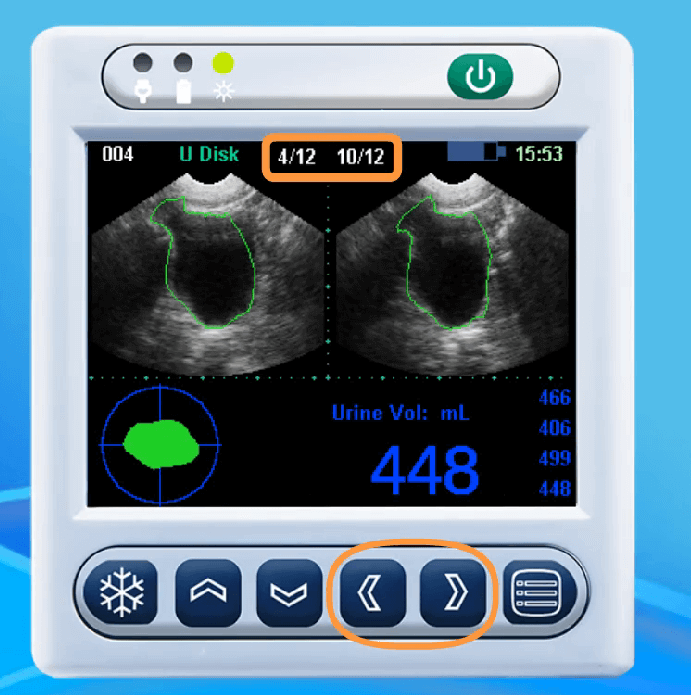
●If the machine is set to Expert: the image display area will generate 12 frames of sectional images of the bladder and automatically draw the border of bladder; of the measured result display area shows the bladder projection and the bladder volume.
You can view six sets of images by following the instructions on the buttons on the images.
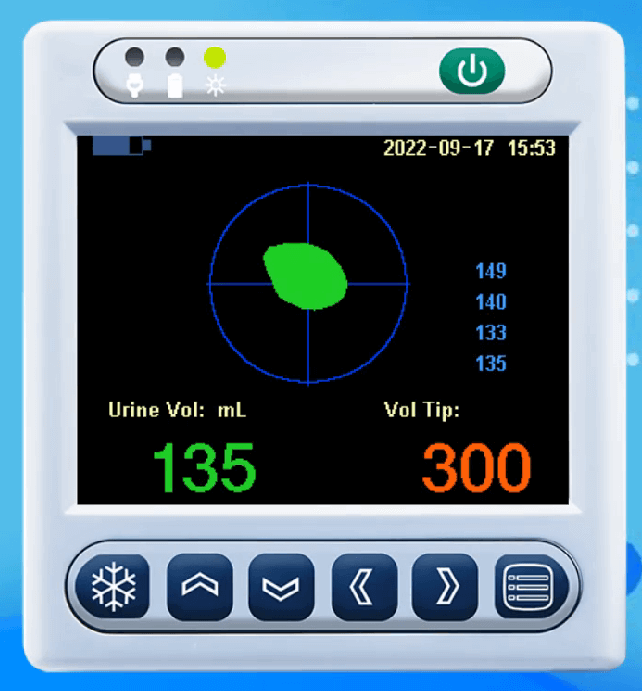
●If the machine is set to Lite: the system will generate a projection of the top view.
Step 6: Confirm The Scanning Results
(1) If the measured result shows "---”, it indicates no detectable result, you need to re-measure;
(2) If an orange arrow appears next to the projection, it indicates the measurement result is unacceptable, the probe must be moved according to the arrow direction and re-scan to measure again;
(3) If a green arrow appears next to the projection, it indicates the measurement result is acceptable, you need to slightly adjust the direction of the probe and re-scan to measure again;
(4) If no arrow appears next to the projection, it indicates the measurement result is correct.
Button function introduction video
Article by
David Smith
David is a urologist with over 9 years of experience. He is also the Co-fonder of BladGo, where he regularly shares his expertise in the field of urology. David is committed to keeping readers up-to-date on the latest urological research and to sharing other beneficial healthcare tips and information so that they can live healthier lives.